Once you have got your Orange Pi Zero 2 shipped, the very first thing you may want to do before starting any serious development work, is to actually test out if the board works up all fine and not damaged during the shipment.
The easiest and best way is to boot one of the stock OS image that is released by Orange Pi itself.
Step 1 : Download the stock OS image
Navigate to the Orange Pi Zero 2 support page and download the OS image. For this post, we are going to make use of Orange Pi OS, but you can also pick Ubuntu or Debian images.

Step 2 : Prepare SD card
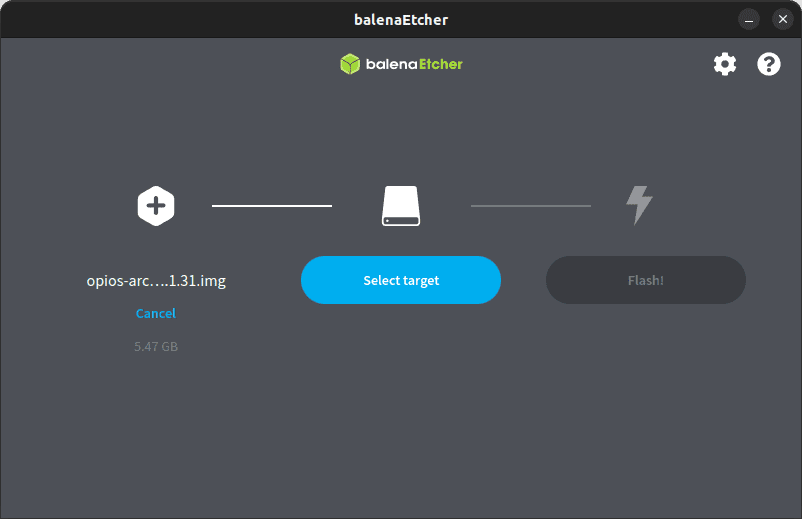
The downloaded image might be compressed (possibly with a .xz extension), so decompress it. Now we are going to make use of a free and open source tool called Balena Etcher, to burn the downloaded image onto the SD card. Install the tool and the UI is quite simple. Following screenshots highlight the steps.

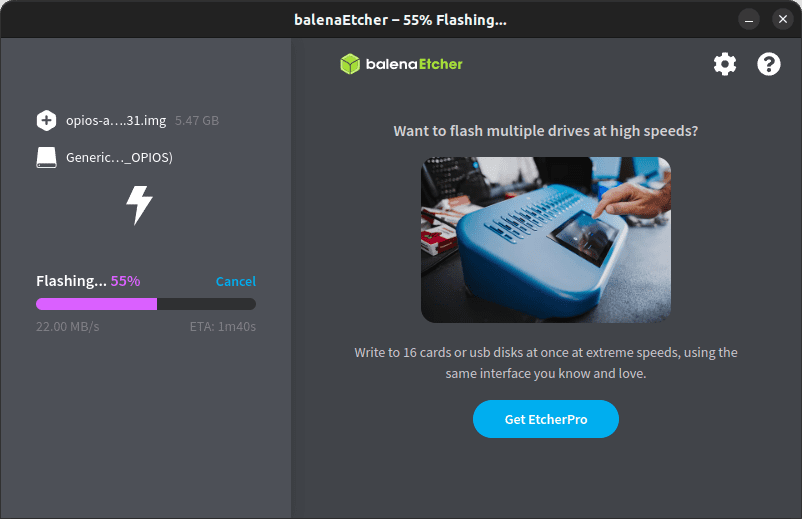
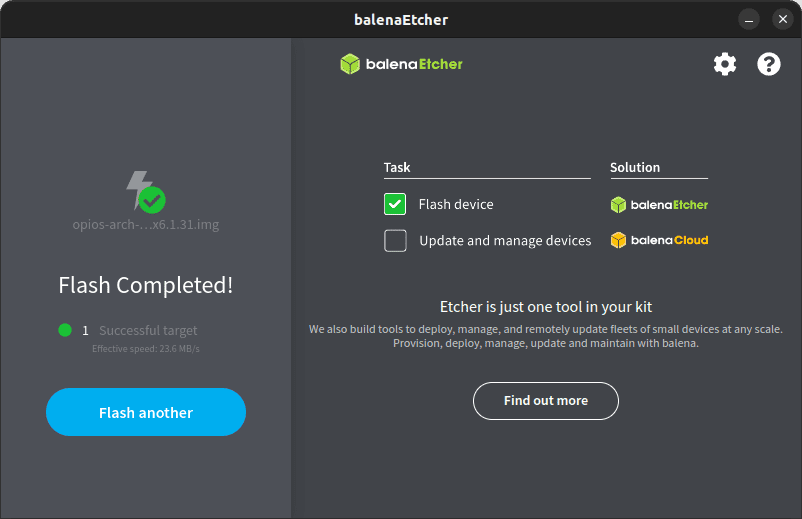
After the flashing is completed, you can eject the SD card from the host machine.
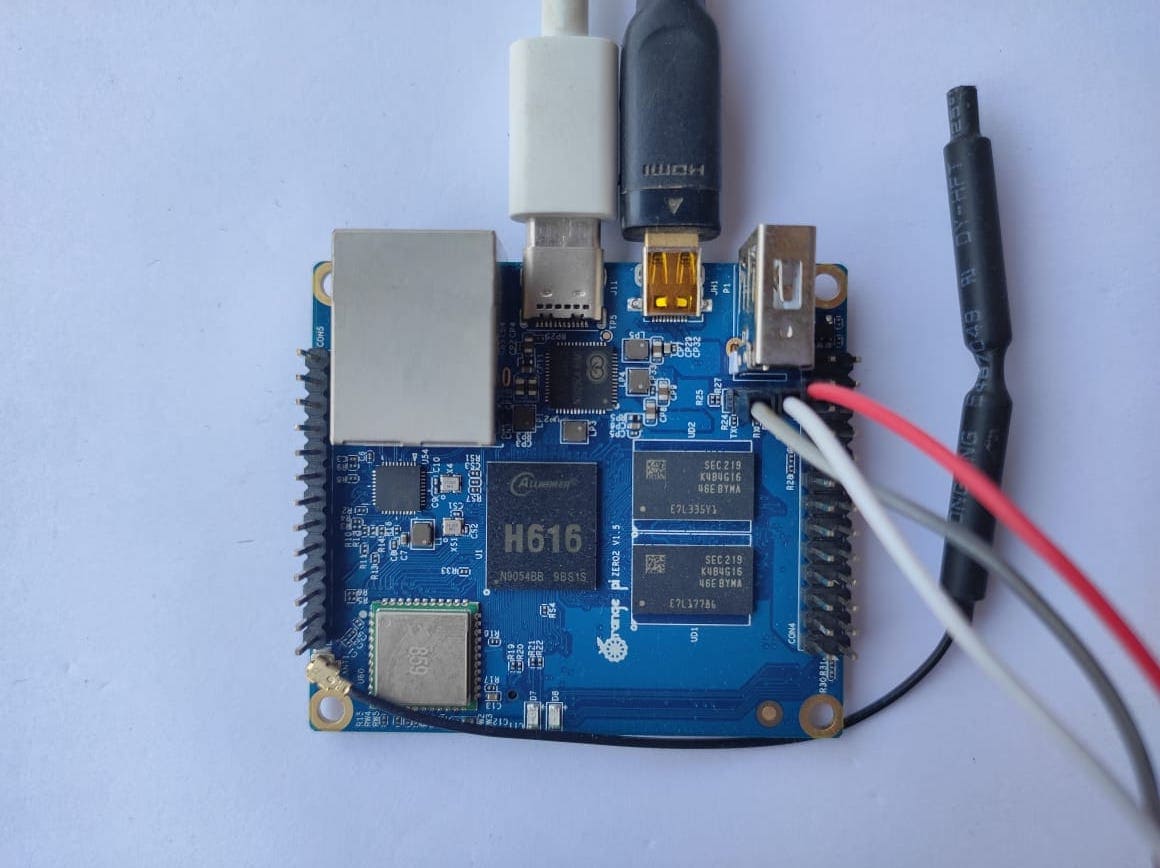
Step 3 : Plug SD card and boot
Plug the SD card onto the Orange Pi Zero 2 board. Make sure you have HDMI cable connected. You can connect a serial debug cable as well, but that’s optional. Power-on the board using the type C cable. If everything is good, you should see the Orange Pi OS booting on the monitor, connected over HDMI. Use a USB hub to connect the mouse and keyboard to the board.
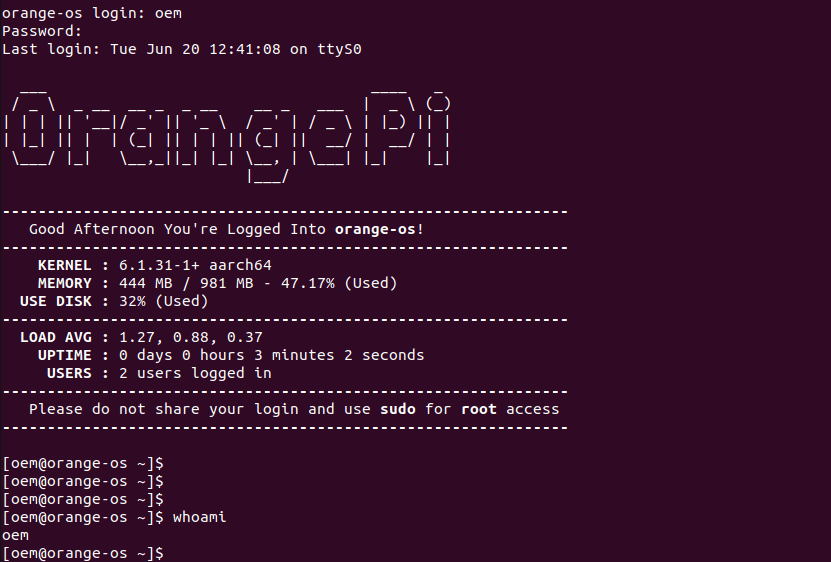
The default username and password should be (oem/oem). In case this does not work, password should be same as the username displayed on HDMI display login screen.
I have made use of serial console and the below screenshot shows the login prompt over the serial.
What’s next ?
If the image boots all fine, then chances are that the board is all fine. However, if you still want to do deeper testing, say testing out SPI, I2C, etc, download the User Manual from the official Orange Pi Zero 2 support page. The manual lists detailed steps to test out different components.
Tip 💡 : Preserve this SD card as you may have to keep coming back to boot this official image in case you need a reference or test something in the official builds.